
Step 1: Login to your EukaPay Account and Access the Dashboard.
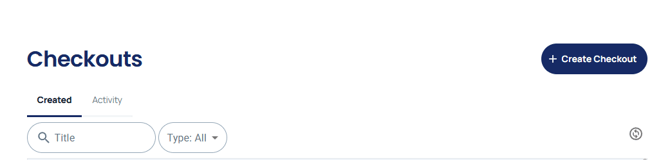
Find the option Checkouts under the Payment Solution category and then click on the Create Checkout button.

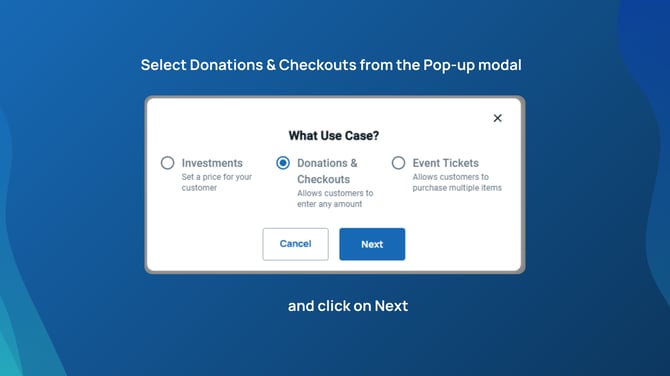
Step 2: From the pop-up modal, select Donations & Checkouts
This option lets the customer or donor enter any amount.
Step 3: Create the Checkout
You can customize your checkout on this page by giving it a Title and Description.
Available options:
- You can set maximum amount you want to accept.
- You can let donor pay anonymously.
- You can let donor cover the processing fee.
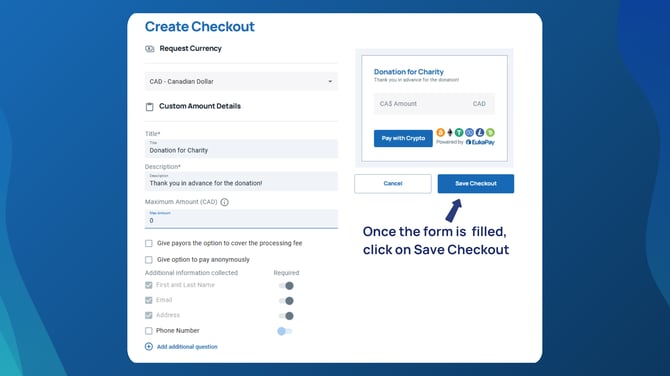
Once all the fields are set, you can proceed to Save Checkout.
Step 4: Using the Checkout
Once the checkout is created, you have three different options to use.
1. Shareable link - Simply copy & paste link on your website or other mediums
2. Button Images - Simply download button images & use with links.
3. Embed - Simply copy & paste iFrame code to integrate checkout directly to your website.
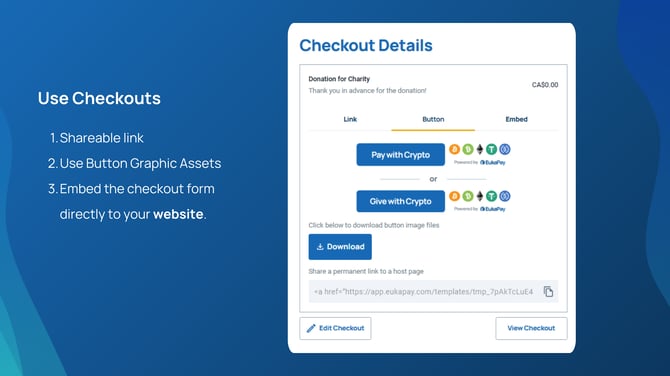
Guide to use each of the three options:
Method 1: Shareable link: You can copy a permanent link to your checkout and share on various medium like website links, chat groups or emails.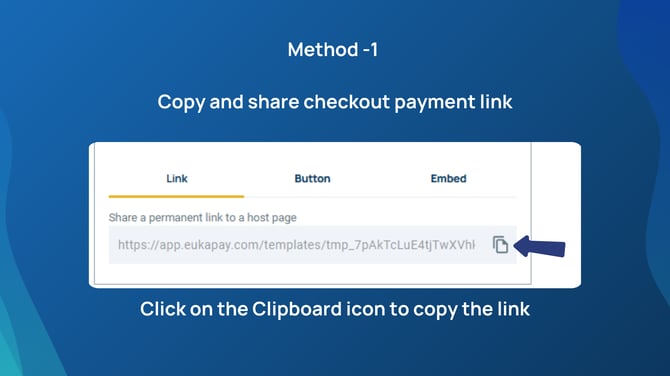
Method 2: Button & Shareable link: We provide your with the 'Pay with Crypto' or 'Give with Crypto' button graphics for a more engaging experience. This button can be used on your website alongside the Shareable link.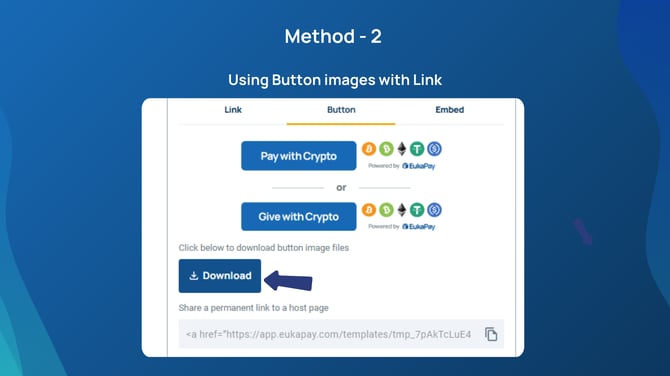
Method 3: Embed: You can simply copy and paste an iframe code into your website to serve an embedded checkout. This is the best way to give your donors a seamless experience.
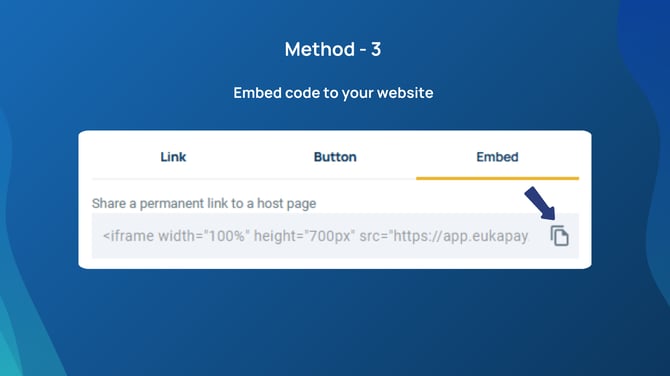
Demo: See how Federation CJA have been using the Embedded Checkouts for their donations.

Step 5: Preview your Checkout
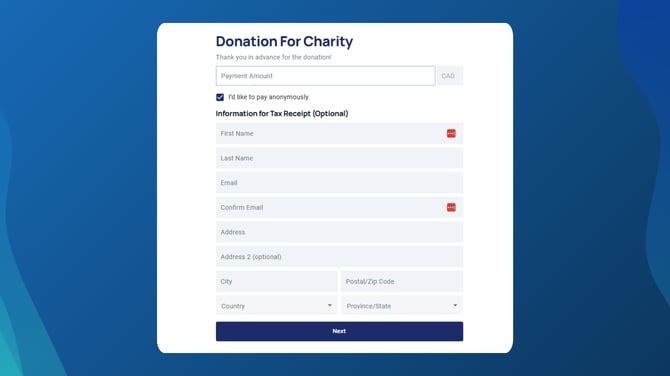
Preview your checkout and experience what your donor would see.
Step 6 (Optional): Branding
You can customize your checkout to give a unique experience to your donor by uploading your logo and setting the brand colors.
To customize branding:
1. You can either directly open the branding settings page using this link. (Recommended)
2. Or go to the Settings Page, then Account Settings > Branding.
Get Help
If you still require assistance in any of the above steps, please let us know at support@eukapay.com